The daedric armor is an iconic armor from TESV : Skyrim and, while building the Daedric Sword, I already had on mind to build it too for my college carnival. I began to look for artists on the internet who had already done this armor, especially those who had done it using foam. Among them, zerios88 and Boris Mzhen have really impressed me, and I decided to focus on their work.
Creating the pieces :
Boris Mzhen, in his TheRPF thread, was using a software called Pepakura which can "unfold" a 3D object to make a pattern. After having the pattern printed, it is possible to build this object. There is two main ways used in cosplay : the one which consist in creating a paper object and then covering it with fiberglass and resin, and the one which consist in creating a foam object. (For information, the first one allows you to create a really sturdy object, but it's pretty expensive and some of the products are toxic.)
An internet user called Zombiegrimm on many websites has built a huge database of pepakura files related to Skyrim which features the daedric armor. However, those files weren't made for foam, and they need to be transformed a bit to be suitable for this use. Using Pepakura Designer, you can choose to hide the flaps [2D Menu - Show flaps] and then lowering the "fold threshold" from 170 to about 160 [Settings - Other Settings]. It will simplify the pieces and make them easier to use with foam.
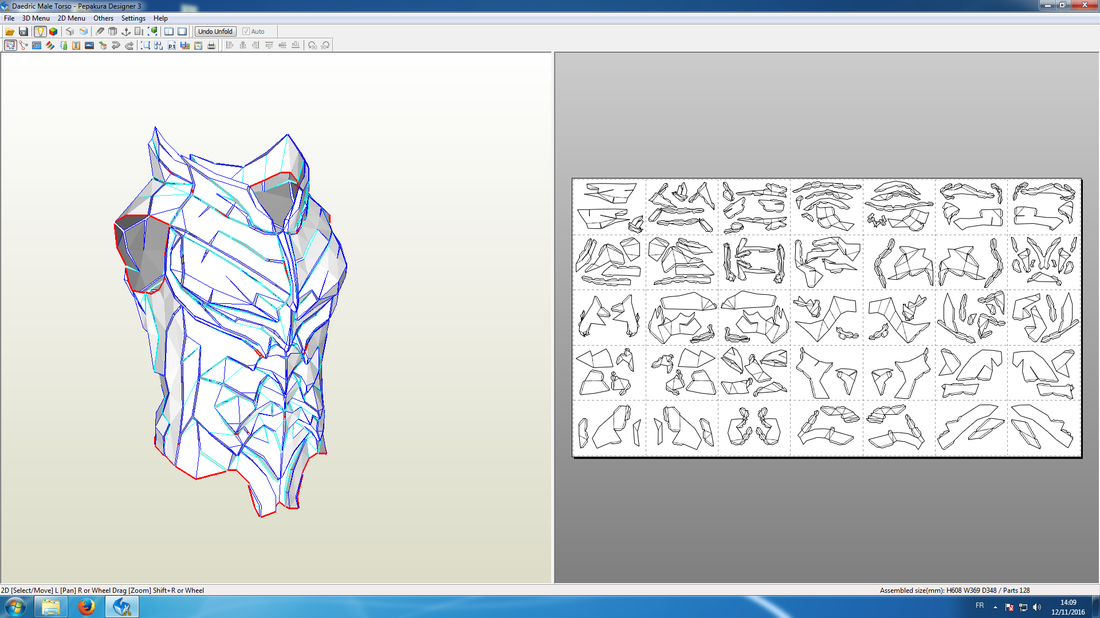
Next, and before printing, you have to scale the object to make it fit you. For this purpose, you can use a measuring tape, and the "Distance between two points" tool [2D Menu - Edit Mode - Measure distance between two points] in Pepakura. Do not hesitate to take multiple times the measures you need if you have doubts. Once the pieces are printed, cut them out and check their size. It may seems useless, but it's better to have lost some time cutting too much paper than loosing hours and (expensive) materials by noticing too late that it wasn't the good scale.
Then, you have to trace each pattern on foam. As far as I'm concerned, I wrote a number on each pattern, then I taped them on my foam roll, I traced their outline before removing them and copying each number on the corresponding shape. I learned a few months ago a trick which consist in pinning the paper patterns on foam to set them.
 From TheRPF
Once you have got all your pieces cut in front of you, you have to put them together. Therefor, you can use either hot glue or barge cement. As far as I'm concerned I've prefered using contact cement but, one year later, I've noticed that some pieces were peeling away. I don't know if the same would happen with hot glue. You'll need an exacto knife, your glue or cement and Pepakura. Using the software, look for pieces which can be easily assembled to make bigger pieces, and find them. On the paper version of each pattern, there are lines showing you where to fold, and if this fold is a valley or a moutain fold, and some numbers which show how to stick pieces together. Identify each folding line, and make inside a "V" cut if it's a moutain fold, or just a "|" cut if it's a valley fold. (It's clearer on the following picture from TheRPF.) It will allow the foam to bend itself where you want, with a pronounced angle. You can also add some glue inside of the "V" cuts to be sure that the fold won't move. If the junction between two pieces makes an angle too, you will have to cut at an angle one of the piece before sticking them together.
Using this method, I've been able to create all the pieces I needed.
Using this method, I've been able to create all the pieces I needed.
The daedric armor also has some kind of black leather skirt, so I bought a little amount of skaï on which I drew my pattern with chalk, trying to be as close as possible to my reference pictures. Then I added some splits to wear it with a belt.
Be careful while using pepakura : the 3D model's proportions aren't always correct. For example, when I built the forearms or shins armor, the length was correct, but the diameter was way to big, and I had to cut them again.
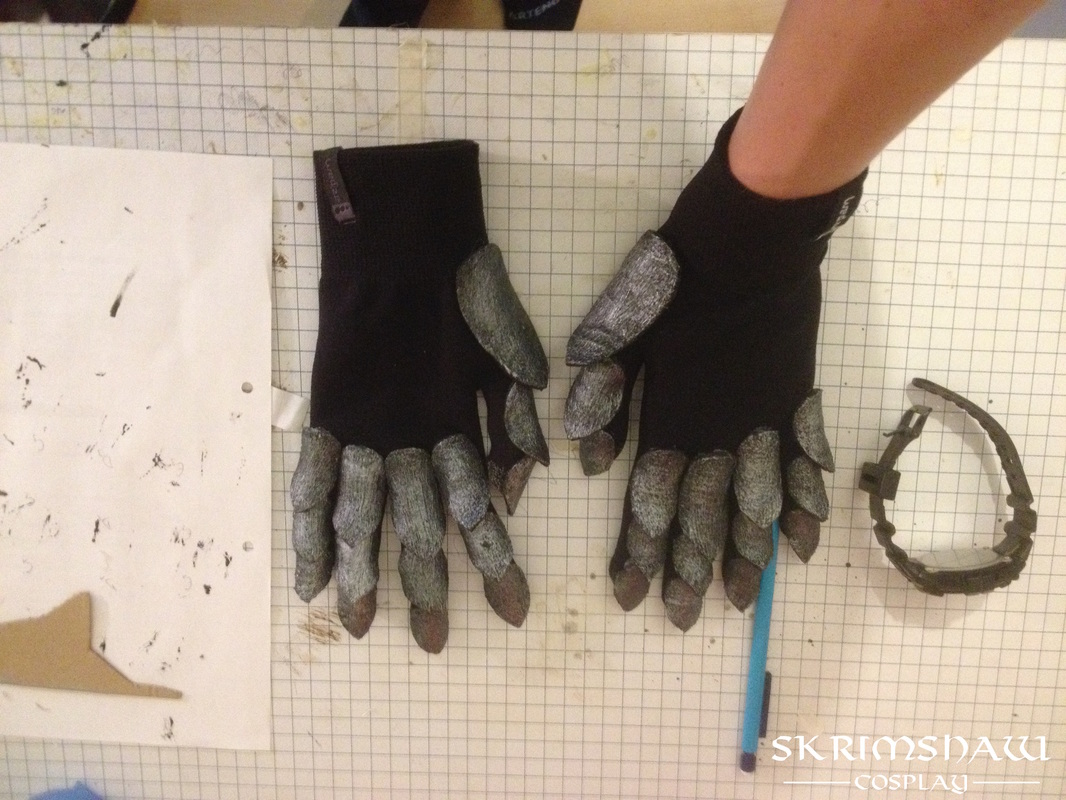
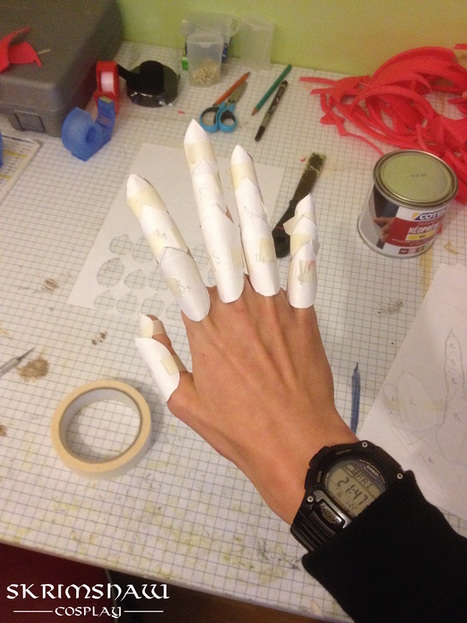
I also had to add some pieces which weren't in the 3D files : the gloves and the shoes. Concerning the gloves, I traced my hand contour on a sheet of paper before drawing each scale.
J’ai également dû ajouter quelques pièces qui ne figuraient pas dans les fichiers 3D : les gants et les chaussures. Pour les gants, j’ai tracé le contour de ma main sur une feuille, puis j’ai dessiné chaque plaque avant de les découper. Je ne les ai reportées qu’une fois sur la mousse, mais j’ai fendu cette dernière en deux dans sa largeur pour obtenir deux pièces plus fines. Pour couvrir les chaussures, je les ai enroulées dans de la cellophane, puis j’ai collé de petites bandes de scotch de peintre par-dessus. En scotchant d’autres pièces de papier par-dessus j’ai cherché à reproduire la forme voulue, ce qui m’a permis de faire un patron utilisable.
Detailing work :
I then had to detail each piece to create the metallic parts, the rivets and the 'organic' parts. With the help of my reference pictures, I began by drawing the contours of my metallic pieces on the foam with a marker pen. I used masking tape to copy those shapes and I used them as patterns to cut out some thin foam pieces. I stuck them with barge cement. I then discovered how to create the rivets out of paper fasteners. You just have to put a small amount of hot glue at the end of its "legs" and drive it into foam before the glue sets. The temperature will slightly melt the foam and the glue will prevent the fasteners from coming back. Afterwards, just bend the legs behind the foam. Concerning the 'organic' details, I took my hot glue gun and I draw some glue interlacing (such as on the sword's hilt and pommel).
Attaching armor :
Once all my pieces were ready, I had to find a way to attach all of them at the right place. I made a slit on each side of the torso and I stuck two velcro strips in. The scales on the biceps were attached with an elastic around my arm and a small clip linked with the torso. Both pauldrons were attached with two larger clips : one on the front of the torse and one on the back. There is another slit in the forearm piece which is held closed with elastic strips. The thighs armors were tied around my leg with another elastic, but it wasn't enough and they were falling a bit more at each step. Finally, the shin pieces were held in place with a strap around the top of my calf.
Painting :
Painting has been one of the most stressful step of this long process. Actually, after trying to paint it with acrylics, I noticed that (because of the distortions) it wouldn't be possible to use it. The solution I ended up with was to use a primer for the flat roofs watertightness, a special paint made with silicon which stay flexible when dry. I applied a first coat on each piece, then a second using a sponge to give it a special texture in some spots. Then I dry brushed all the metallic parts, the rivets and the hot glue interlacing with a silvered acrylic paint. I also tried to apply some flexible varnish to protect the paint from frictions. Unfortunately, I didn't try it on some leftovers before applying it on the armor, and it all became whitish when it dried. Thereby I had to add another coat of black paint and re-brush the metallic parts.
I've modified the finger armor after having them painted. Indeed, I've noticed that they were a lot too thin and thereby too breakable to be worn. That's why I've stuck a thin plastic sheet under each scale before cutting it in the right shape. They are almost invisible, but they have made the gloves much more resistant.