
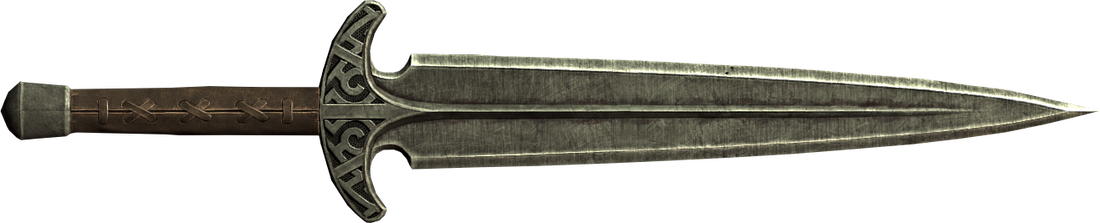
The steel dagger, from the video game The Elder Scrolls V : Skyrim, is a more widespread weapon than the daedric sword. It has a simple enough shape, while keeping some details around the hilt like geometrical motifs and a lacing around the handle, which I'm really pleased with. But it was especially an opportunity for me to try some new materials, sturdier than foam.
First of all, I had to find some base pictures (such as the one above) in order to get the right proportions and choose which part of the dagger would be raised, sanded and detailed. I've printed a life-sized dagger based on the length that the handle should have. Then I've cut this 17inches main shape twice on a 1/4inch thick foam. I've slightly dug in these pieces to be able to slide a wood stick in, which stiffen the whole dagger. Then I've stuck everything together.
First of all, I had to find some base pictures (such as the one above) in order to get the right proportions and choose which part of the dagger would be raised, sanded and detailed. I've printed a life-sized dagger based on the length that the handle should have. Then I've cut this 17inches main shape twice on a 1/4inch thick foam. I've slightly dug in these pieces to be able to slide a wood stick in, which stiffen the whole dagger. Then I've stuck everything together.
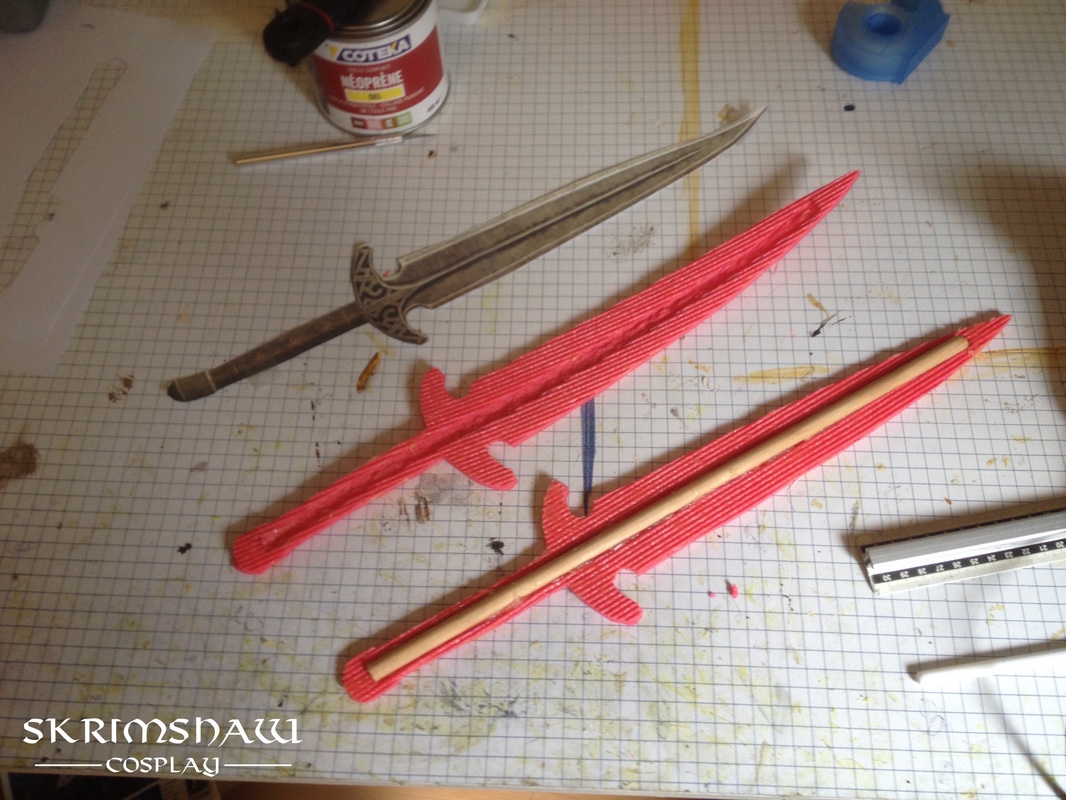
The main parts and the stick.
I've cut the hilt and the pommel away in the printed picture, in order to cut them in foam and stick them on the main part. Then, I cut the edge, trying to cut the whole length in a single time. It made four long strips, and I stuck two of them from the hilt to the tip of the dagger.
Later, I used a Dremel tool to make these sharp-edges more regular, sand the pommel until it was almost round, and smooth the edges of the foam slabs.
Later, I used a Dremel tool to make these sharp-edges more regular, sand the pommel until it was almost round, and smooth the edges of the foam slabs.
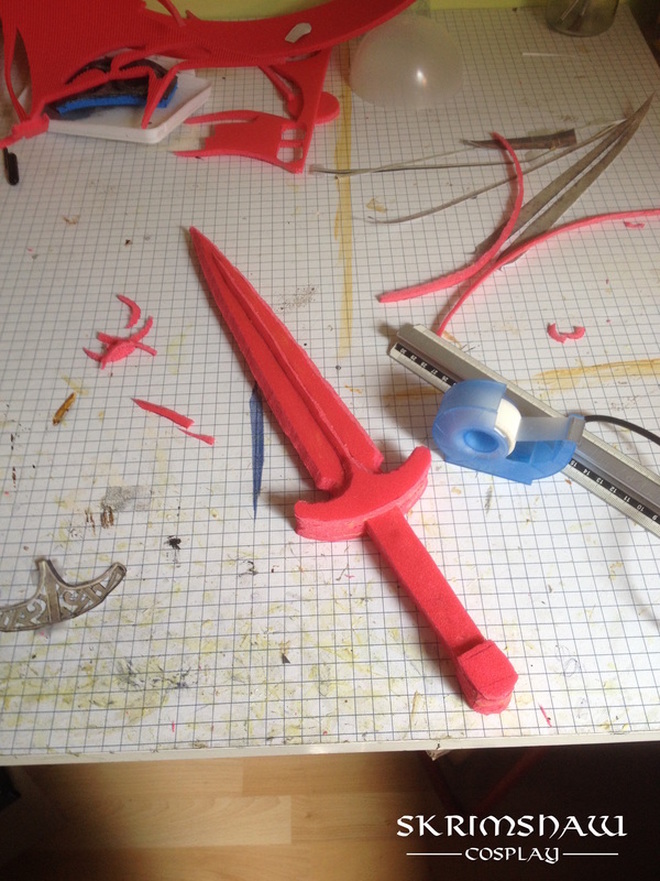
A bit of carving (pommel not sanded).
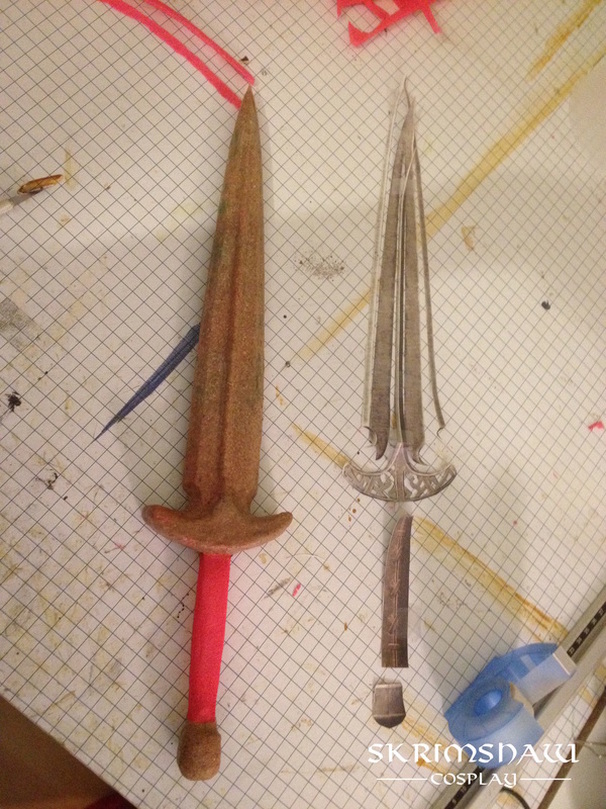
At this step the main shape is done, it's time to add something to make a sturdier weapon.
I've seen dlshadowwolf's video ( [Worblapie - How to make your own Worbla] ) which learned me how to create a pasta which looks like Worbla from simple cheap materials. For this dagger, I used a mixture made of PCL and sawdust, with 80% PCL and 20% sawdust. Yet this mixture ended up to be hard to use because of its stickiness, and I'm now using a new mixture with 70% PCL and 30% flour, simpler to use for a similar result.
To make this 'worblapie', you just have to weight the good proportions, then mix it before laying it in a glass plate and bake it. For me, baking it 15min at 120°C is enough. Then, you'll have to take this mixture of melted plastic and flour out of the oven and knead it until you get an homogeneous pasta. If it become hard before, juste take a heat gun and re-heat it, or put it back in the oven. Then, depending of what you wish to do with it, you could wish to create a thin leaf of worblapie. You can use either a rolling pin or a pasta machine. I prefer the pasta machine because it can create a really thin and regular pasta, even if it has some drawbacks due to the stickiness of plastic and metal.
After creating this worblapie, I cut a shape slightly bigger than the dagger and I heated it with the heat gun until it naturally felt over the dagger. Then, I re-heat the plastic one area after the other, pressing on each angles and details.
Once the plastic is applied.
Then, I've cut in the plastic some long strips which are a few millimeters wide to make the detailing work. I used the base picture to draw the geometrical motifs on the hilt, and I heat and cut the strip to create these motifs. The german cosplayer Kamui explain this process pretty well in her blog.
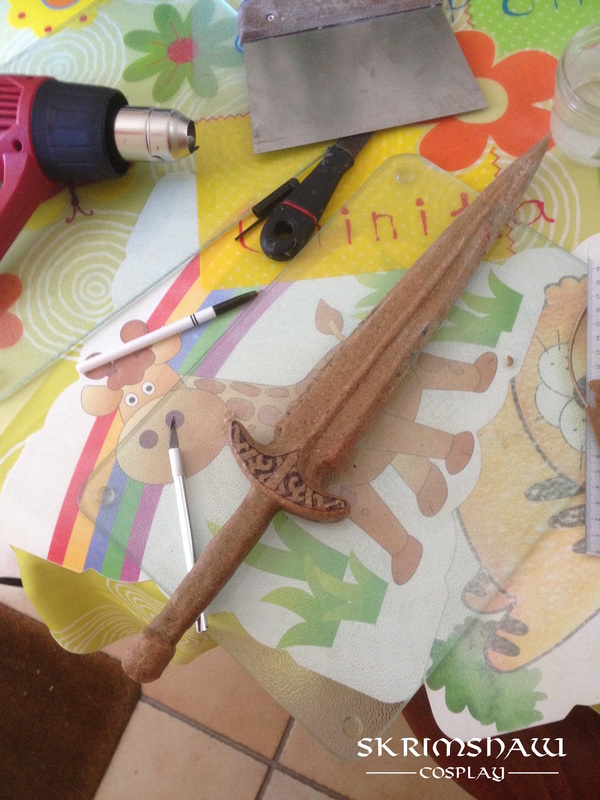
Drawing the details on the hilt.
After all the detailing work, the base of the dagger was done.
So began I the paint job, following the same steps as for the sword. I applied some Gesso coats to create an undercoat for the acrylic paint, then some coats of black acrylic and a dry brush with a metallic paint, to create a steel-like aspect on the blade, the pommel and the hilt. It could be great to had some varnish to protect the painting from impacts and friction.
So began I the paint job, following the same steps as for the sword. I applied some Gesso coats to create an undercoat for the acrylic paint, then some coats of black acrylic and a dry brush with a metallic paint, to create a steel-like aspect on the blade, the pommel and the hilt. It could be great to had some varnish to protect the painting from impacts and friction.
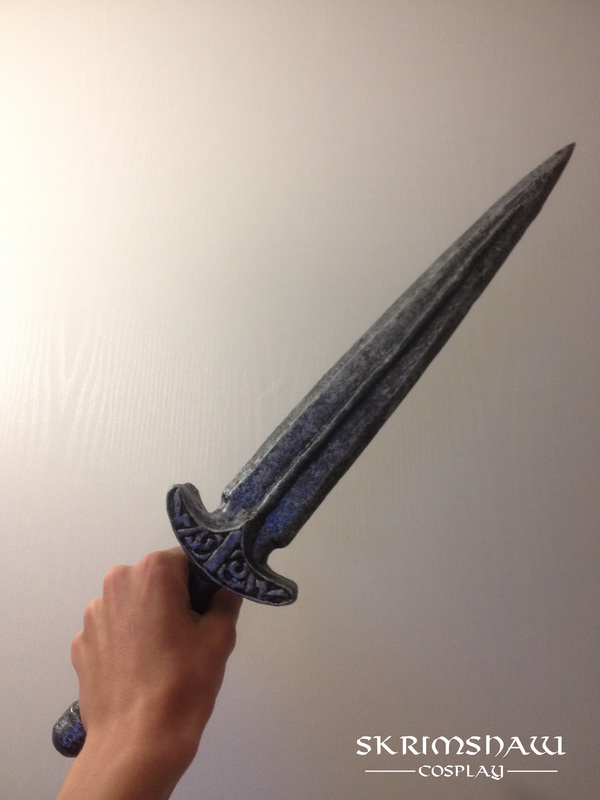
Paint job done.
Finally, I had to add the leather on the handle. I cut a rectangle in leather and stuck it with contact cement around the handle, and then cut some small circles where the leather straps were on the base picture. Then, I cut these straps and stuck them in the circles made earlier. I won't say anything more about this process, because you should be able to find something which produce a sturdier, more lasting and more discreet result.
So here is the final result :
So here is the final result :
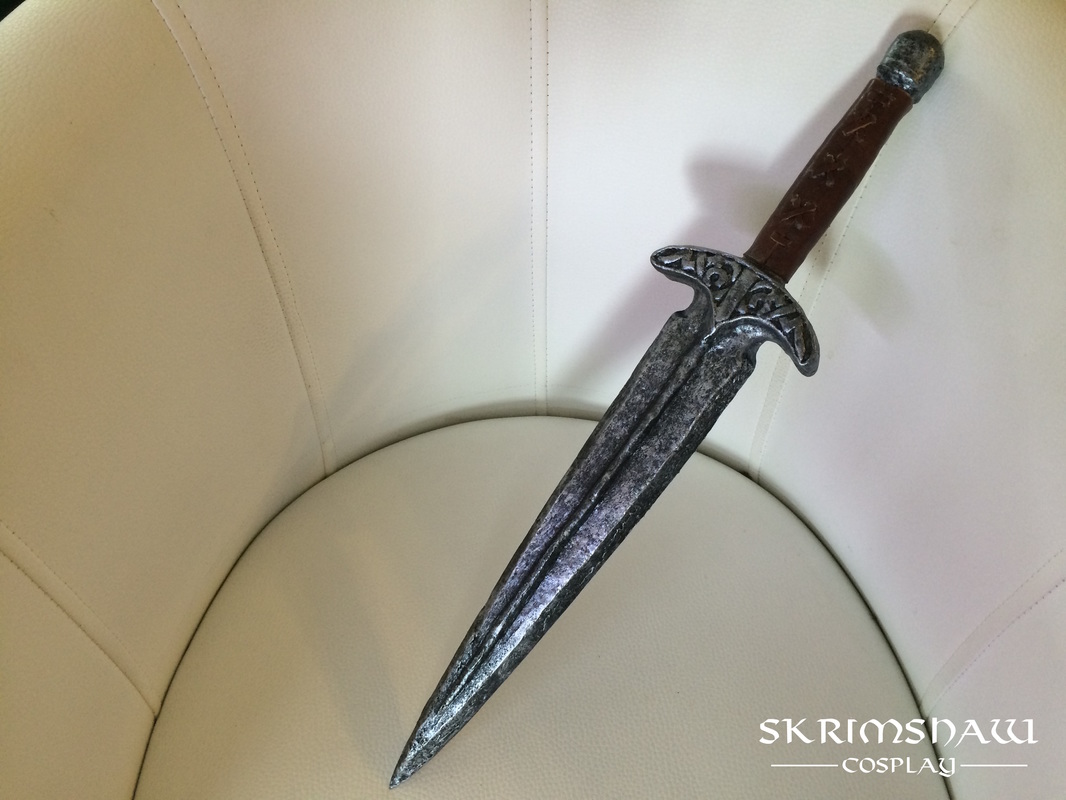
The dagger done.
