

The daedric sword is one of the most famous weapons from the game The Elder Scrolls : Skyrim. It's a one-handed sword, with a long indented blade. Its pommel and its guard have an appearance which look a bit organic, whereas the blade has many runes. I especially liked this mix between nature and magic, so I decided to make it.
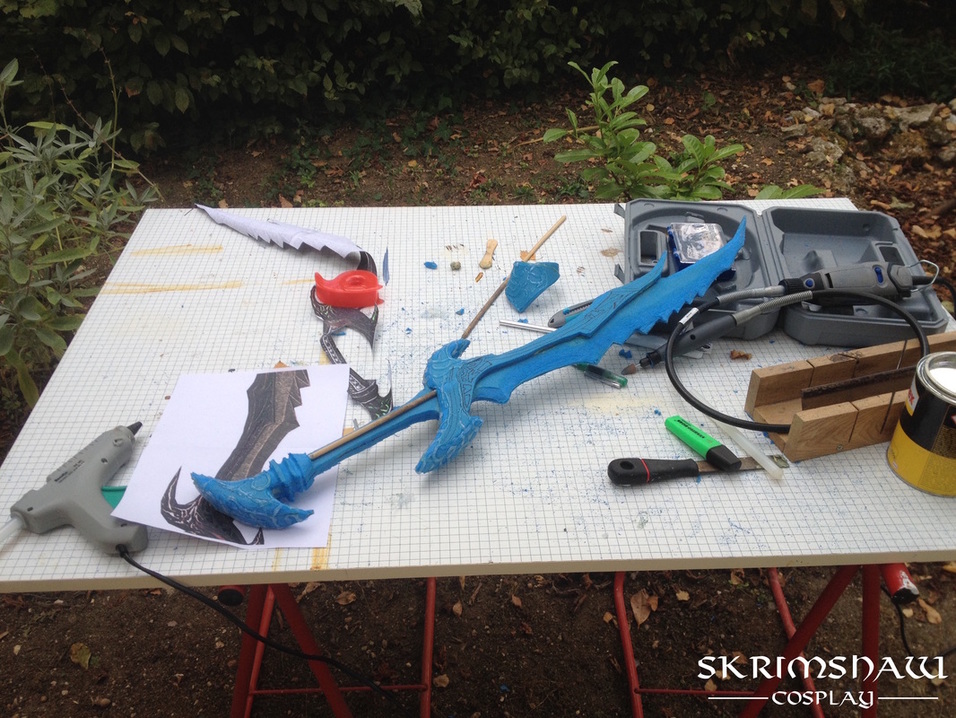
I began by printing the sword life-size with the above picture, in order to draw the shape without loosing the proportions. It's about 80cm long (31,5 inches), so the handle is slightly longer than the palm of my hand. I divided the picture in three areas : the main shape, the pommel and the increased height of the blade (the black area made of the guard and its prolongation), and I drew each shape on the foam twice. It allow to get a symmetrical build, just like a sandwich, with one foam slab for each side. The foam I used come from a camping mat which is 8mm thick (about 1/3inches), I think it's polyethylene.
Then, I dug in the foam to slide wood sticks in it, to make a stronger sword (we can see one of the sticks on the handle on the picture bellow). I stuck these sticks in the place with hot glue, then the foam slabs together with contact cement (not sure of the english name...). At this stage, the sword looks like a pilling of slabs, with right-angled edges.
Using a Dremel tool, I sanded the whole sword, looking at the reference picture to get the right curves and the edge of the blade. I finally got a rounded shape with pointed end, but I still didn't have the organic and irregular appearance. I heated the sword with a heat gun to get it to melt a bit and seems smoother. Then, I used my hot glue gun to add some glue mesh on the pommel and the guard.
The main form is almost done, it just needs the runes on the increased height of the blade. I started by drawing them with a marker, trying to be as close as possible of the reference picture, and then I took an exacto knife and I cut the outlines pushing the blade only a few millimeters deep. I simply snatched the foam inside the delimitations, and the sword was done.
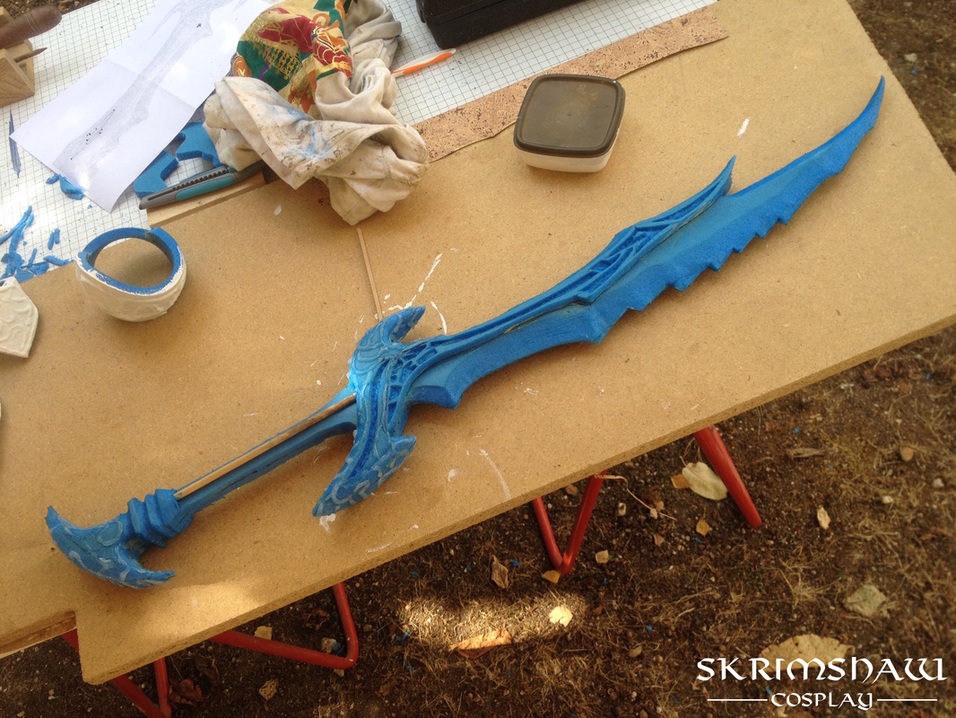
The shape done (with runes)
Then it was the time for painting. I began by painting the whole sword with two Gesso coats, an acrylic primer which make an undercoat and prevent the paint from soaking the foam, sanding between each coat to get an as smooth as possible look, without brush marks. After this step, I applied two coats of black acrylic to create a plain background that favors the metallic appearance later, and on which one the colors will be added.

The black undercoat (sorry for the poor quality of the picture)
At this stage, I had to add the colors, in a very simple way because it's juste a dry brush with a grey acrylic paint.
To make a dry brush, you just have to take a very little amount of paint on your paintbrush (you can even wipe it quickly with a tissue before using it) and make quick brushings over the edges of your weapon, or every area to which you want to give a metallic look. You can press the brush firmer or try with more paint for an accentuated metallic look (such as on the blade). It will reveal your reliefs by dropping off the paint on the edges unevenly, and avoid the too clean look of an homogeneous metallic painting.
Using a red paint that I found in an unknown origin box, I added small amount of red inside some runes, as shown on the reference picture.
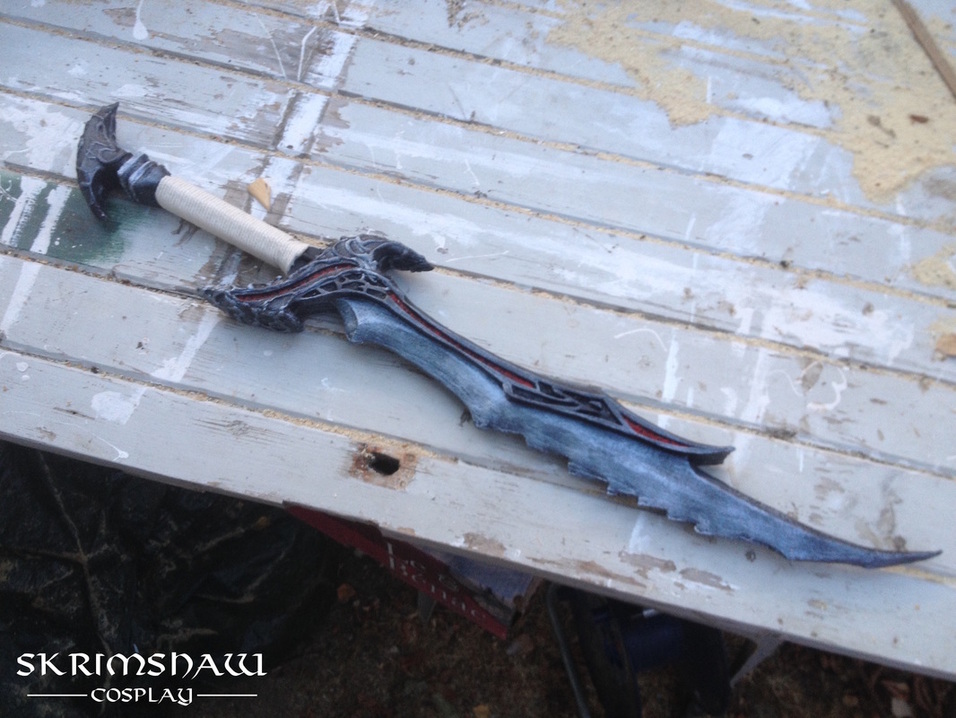
Paint job done.
The last step was to add the cord around the handle of the sword, but before that I had to add two small wood slabs to prevent the foam from being flattened by the pressure of the rope.
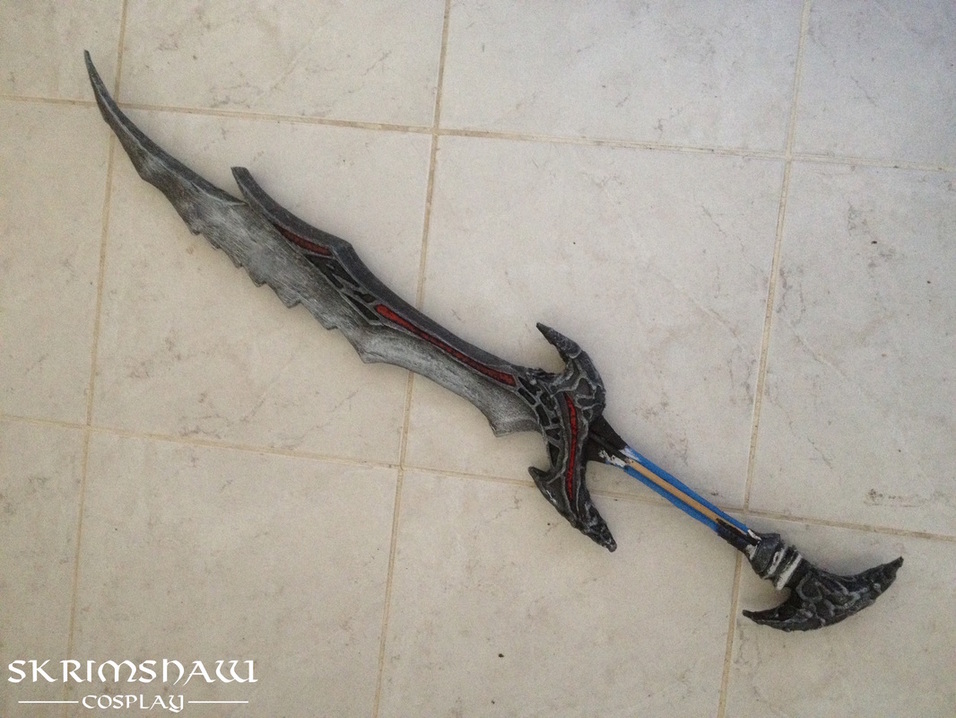
It has been a bit difficult to stick it around the handle, and I had to ask for help. By turning the sword on itself regularly, we were able to stick it with wood glue. But I didn't have the tools to add the two long slabs over the rope, so I stopped, and here is the final result :
It has been a bit difficult to stick it around the handle, and I had to ask for help. By turning the sword on itself regularly, we were able to stick it with wood glue. But I didn't have the tools to add the two long slabs over the rope, so I stopped, and here is the final result :
The sword done.
Beware :
- Finally, the handle has a too much regular shape for this sword and its tortured look. Moreover, the connection with the sword is debatable. If you want to try to do it too, be careful with that (even if the original handle is far too thin to be held).
- The acrylic paint is useful and cheap, but it has as main problem that it is very unbending, and it crack at the first twist, especially on a flexible support such as the foam. I didn't used varnish, so I don't know if it can fix it or reduce this problem. Anyway, the paint on the end of the blade cracked a bit later.
